
Oppo Mirror 3 Review: Shoot in the Dark With Confidence
One of the most wanted features in a smartphone is a good camera. We get umpteen requests from our readers asking us to recommend a phone under Rs. 20,000 which can take great photos. While there are phones with sensors that can capture good images in daylight, almost all of them produce subpar images in low light situations. Oppo believes it has the answer to this common problem with its latest midrange smartphone the Oppo Mirror 3.
Oppo has fitted the Mirror 3 with an 8-megapixel camera which uses a backside-illuminated (BSI) Sony IMX179 sensor, which is touted to have great performance in low light. On the other hand, at least on paper, the rest of the Oppo Mirror 3's specifications look slightly underwhelming for its price. We've spent some time with the device to find out if the performance of its camera is enough to warrant a purchase.
 Look and feel
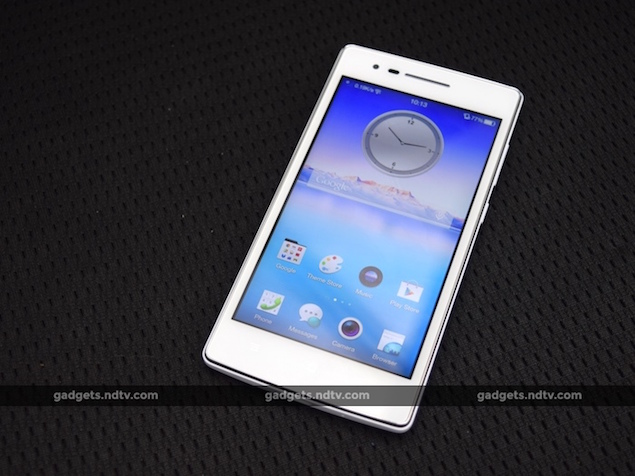
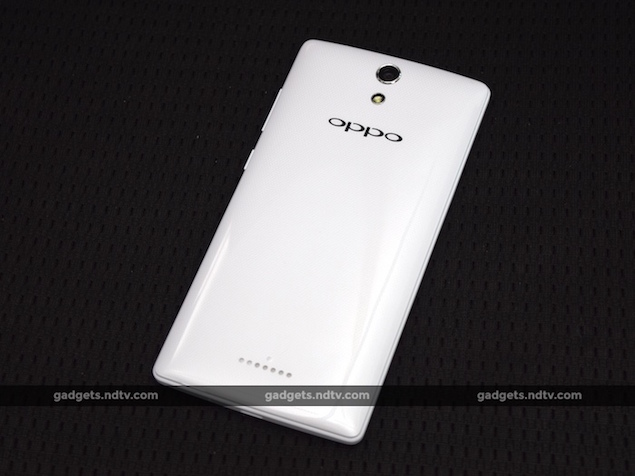
We really like Oppo's finesse and attention to detail when making smartphones. The Mirror 3 might not have a very different design from any other candybar phone, but it does look and feel premium for its price. Most importantly, it is a refreshingly small phone considering we've been using a lot of smartphones with 5-inch or larger screens. We could easily pull it out of a pocket and start using it with one hand. The fact that the rear is curved ever so slightly makes it more comfortable to hold.
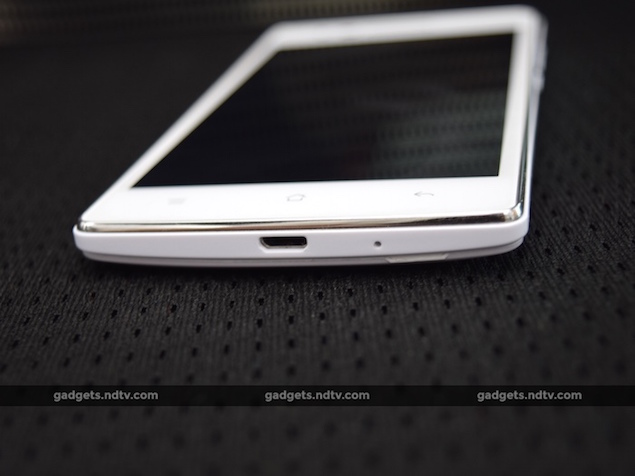
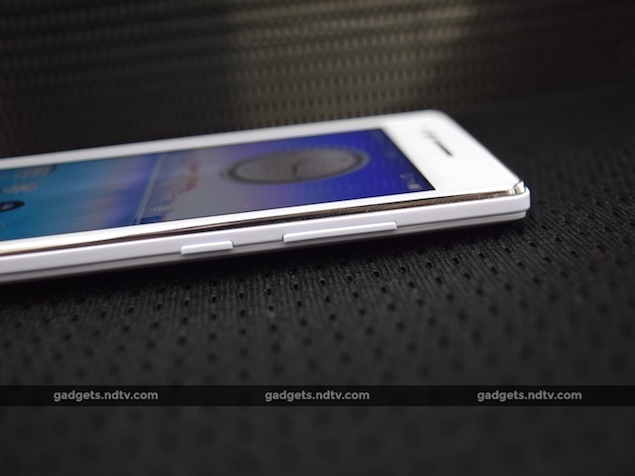
 The Oppo Mirror 3 has compact dimensions of 137.7x68.8x8.9mm, and weighs a comfortable 130g. The body is made entirely of plastic but it feels sturdy on the whole although the power button and volume rocker on the right are made using cheap plastic. Pressing the buttons gave us the feeling that they would break, thanks to their distinct clicky sound. The Micro-USB port and a microphone for phone calls are on the bottom of the phone. On the other hand, the top houses the 3.5mm audio port, another microphone for recording sound during video capture, and an Infrared emitter.
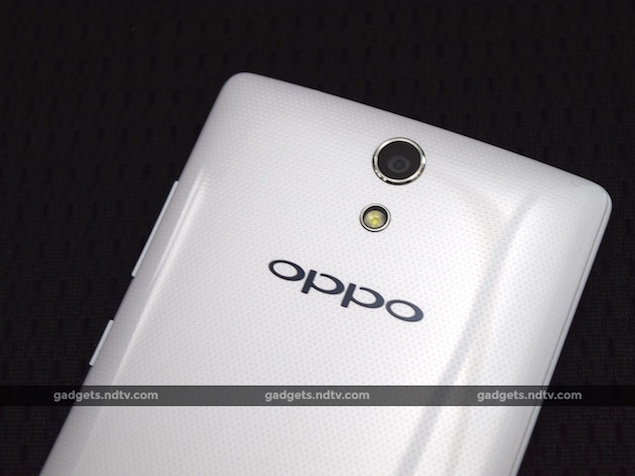
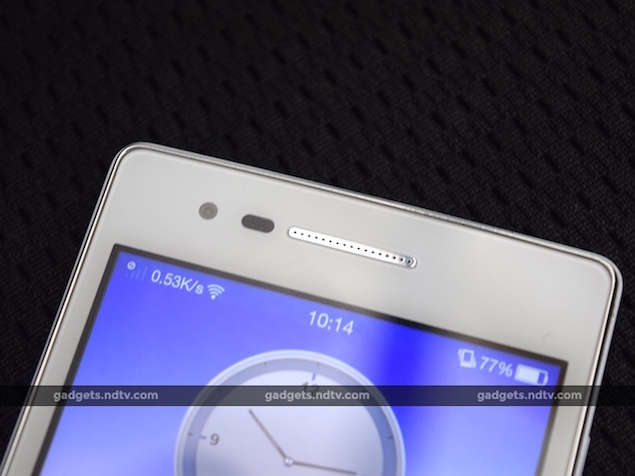
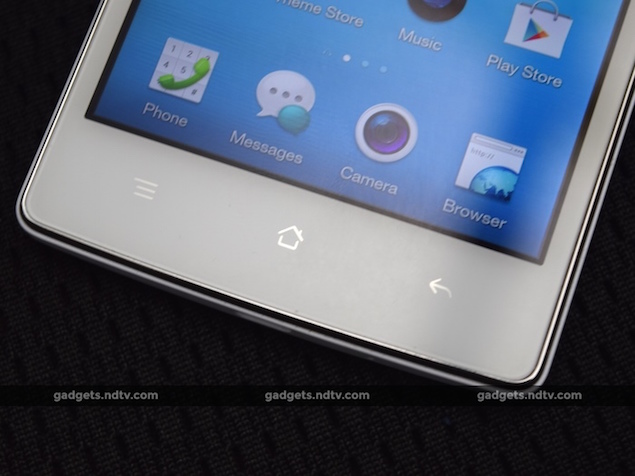
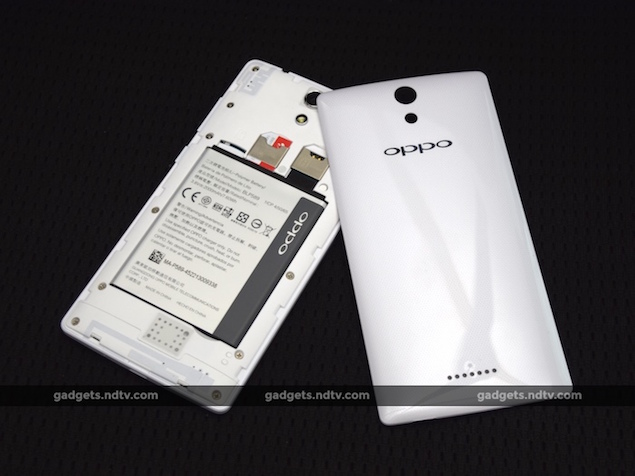
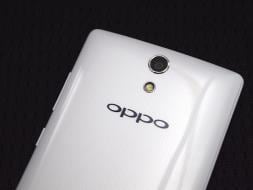
Below the screen is a row of capacitive buttons, used to navigate through the operating system. The earpiece, cutout for the ambient light sensor, and front camera are above the screen. The rear cover has a textured look but it is covered in a coat of gloss and so feels smooth to touch. The camera and flash have metallic rings around them. Also, there are seven machine-drilled holes on the bottom for the speaker. The rear cover conceals the battery compartment, two Micro-SIM card slots, and the microSD card slot.
 Specifications and software
As we stated before, the Oppo Mirror 3 doesn't have class-leading specs. There is a 1.2GHz quad-core Qualcomm Snapdragon 410 SoC with Adreno 306 graphics under the hood. There is also 1GB of RAM and 8GB of internal storage. 8GB might feel like very little space but you can expand it by up to 128GB using a microSD card. Furthermore, the Mirror 3 can also act as a USB host through its Micro-USB port. These specifications are underwhelming because other phones that cost much less also use the Snapdragon 410 SoC, and 2GB of RAM has pretty much become the norm these days.
 The Mirror 3's 8-megapixel main camera has an f/2.0 aperture, 5P lens and Blue Light Filter. The secondary 5-megapixel camera on the front can be used to capture selfies. Only one SIM card can be used to connect to a 3G network. Other connectivity options include Infrared, Bluetooth 4.0, and Wi-Fi a/b/g/n. The phone has a 2,000mAh battery providing the juice for it to function.
The 4.7-inch IPS LCD panel has a resolution of 720x1280 translating to a pixel density of 312ppi. There is a layer of Corning's Gorilla Glass 3 on top of the screen to protect it. The display is bright and adequately saturated with colours. Even the viewing angles and legibility under direct sunlight are good. Oppo has rarely disappointed us with the displays on its phones. That said, some might argue that the display specifications are below average when compared with other similarly priced phones.
 Oppo slaps its homegrown Color OS 2.0 skin on top of Android 4.4.4 KitKat. Not running Lollipop out-of-the-box is a negative for the Mirror 3. Color OS 2.0 is a polished, clean, and light skin, but it doesn't look anything like stock Android. There are a few tweaks and tricks that add some value, though these are not exclusive to Color OS 2.0. For example, we really liked that we could monitor the speed of our 3G connection in the status bar. Even the gesture and motion tricks work well for most part. Oppo also allows users to tweak themes according to their preferences.
Camera
The camera app is feature rich and modes are available within the app, which can be added or removed as per your preferences. Regular suspects such as HDR, Panorama, and Expert mode are present. However, there were also more unique and exciting ones, such as Colourful Night, Double Exposure, and GIF. Colourful Night mode enhances colours to make photos taken in low-light situations look richer. Double Exposure allows you to shoot two images and superimpose one on top of the other to create an artistic effect. GIF mode, for those who have been living under a rock, basically creates a moving picture.
 (Click for full size)
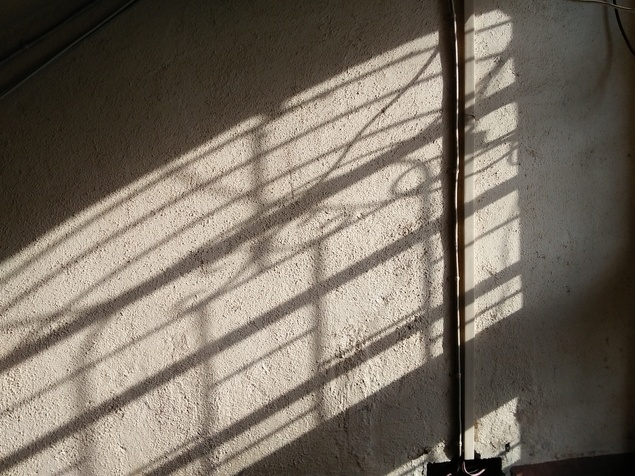
Our sample images in regular light conditions had good amounts of detail and didn't look pixellated at all. However, the overall tone was a little too warm for our liking. You will need to use HDR to prevent images from being overexposed. Tip: contrary to popular belief, you will get better photos from under shadows than in harsh sunlight.
 (Click for full size)
The BSI sensor shows off its prowess in low light situations and we really got some very impressive shots. There is a perceptible amount of noise but it is not as bad as other smartphone cameras. In fact, the low light performance of the camera is on par with that of the Huawei Honor 6 Plus (Review | Pictures), and that is saying a lot.
 (Click for full size)
The 5-megapixel front camera does a very good job of capturing selfies, even without the Beautify effect applied. 1080p video captured by the camera was, on the other hand, a letdown, primarily because even in sufficient light a lot of areas were underexposed.
 (Click for full size)
Performance
Performance-wise we have no complaints, but the Mirror 3 is far from a powerhouse. It does basic tasks well but struggles the moment you throw anything intensive at it, such as graphically-rich games like Asphalt 8.
 In the AnTuTu and GFXbench tests, the Mirror 3 scored 19,840 and 10,974 respectively, which are slightly lower than some other smartphones we've tested in the past with the same SoC. The graphics benchmark test 3DMark Ice Storm returned a score of 5,236, whereas the phone achieved 9.5fps in GFXbench.
The Mirror 3 played all the videos we there at it, including our most heavily encoded 40Mbps sample footage. The speaker is adequately loud and the bundled earphones will more than suffice for normal usage. The quality of sound in phone calls is pretty good, and we didn't face any call drops either. The battery lasted 8 hours and 1 minute in our video loop battery test, which is surprisingly decent for a phone with a 2,000mAh battery.
 Verdict
The Oppo Mirror 3 is priced at Rs.16,990, which is slightly steep for what it offers. However the primary camera shoots great low-light shots, which could be a great selling point for many buyers. Buy this only if you want to use your smartphone to capture photographs or if you get a kick out of using your phone as an Infrared remote control for all your electronic appliances.
Oppo has fitted the Mirror 3 with an 8-megapixel camera which uses a backside-illuminated (BSI) Sony IMX179 sensor, which is touted to have great performance in low light. On the other hand, at least on paper, the rest of the Oppo Mirror 3's specifications look slightly underwhelming for its price. We've spent some time with the device to find out if the performance of its camera is enough to warrant a purchase.
Look and feelWe really like Oppo's finesse and attention to detail when making smartphones. The Mirror 3 might not have a very different design from any other candybar phone, but it does look and feel premium for its price. Most importantly, it is a refreshingly small phone considering we've been using a lot of smartphones with 5-inch or larger screens. We could easily pull it out of a pocket and start using it with one hand. The fact that the rear is curved ever so slightly makes it more comfortable to hold.
The Oppo Mirror 3 has compact dimensions of 137.7x68.8x8.9mm, and weighs a comfortable 130g. The body is made entirely of plastic but it feels sturdy on the whole although the power button and volume rocker on the right are made using cheap plastic. Pressing the buttons gave us the feeling that they would break, thanks to their distinct clicky sound. The Micro-USB port and a microphone for phone calls are on the bottom of the phone. On the other hand, the top houses the 3.5mm audio port, another microphone for recording sound during video capture, and an Infrared emitter. Below the screen is a row of capacitive buttons, used to navigate through the operating system. The earpiece, cutout for the ambient light sensor, and front camera are above the screen. The rear cover has a textured look but it is covered in a coat of gloss and so feels smooth to touch. The camera and flash have metallic rings around them. Also, there are seven machine-drilled holes on the bottom for the speaker. The rear cover conceals the battery compartment, two Micro-SIM card slots, and the microSD card slot.
Specifications and softwareAs we stated before, the Oppo Mirror 3 doesn't have class-leading specs. There is a 1.2GHz quad-core Qualcomm Snapdragon 410 SoC with Adreno 306 graphics under the hood. There is also 1GB of RAM and 8GB of internal storage. 8GB might feel like very little space but you can expand it by up to 128GB using a microSD card. Furthermore, the Mirror 3 can also act as a USB host through its Micro-USB port. These specifications are underwhelming because other phones that cost much less also use the Snapdragon 410 SoC, and 2GB of RAM has pretty much become the norm these days.
The Mirror 3's 8-megapixel main camera has an f/2.0 aperture, 5P lens and Blue Light Filter. The secondary 5-megapixel camera on the front can be used to capture selfies. Only one SIM card can be used to connect to a 3G network. Other connectivity options include Infrared, Bluetooth 4.0, and Wi-Fi a/b/g/n. The phone has a 2,000mAh battery providing the juice for it to function. The 4.7-inch IPS LCD panel has a resolution of 720x1280 translating to a pixel density of 312ppi. There is a layer of Corning's Gorilla Glass 3 on top of the screen to protect it. The display is bright and adequately saturated with colours. Even the viewing angles and legibility under direct sunlight are good. Oppo has rarely disappointed us with the displays on its phones. That said, some might argue that the display specifications are below average when compared with other similarly priced phones.
Oppo slaps its homegrown Color OS 2.0 skin on top of Android 4.4.4 KitKat. Not running Lollipop out-of-the-box is a negative for the Mirror 3. Color OS 2.0 is a polished, clean, and light skin, but it doesn't look anything like stock Android. There are a few tweaks and tricks that add some value, though these are not exclusive to Color OS 2.0. For example, we really liked that we could monitor the speed of our 3G connection in the status bar. Even the gesture and motion tricks work well for most part. Oppo also allows users to tweak themes according to their preferences. Camera
The camera app is feature rich and modes are available within the app, which can be added or removed as per your preferences. Regular suspects such as HDR, Panorama, and Expert mode are present. However, there were also more unique and exciting ones, such as Colourful Night, Double Exposure, and GIF. Colourful Night mode enhances colours to make photos taken in low-light situations look richer. Double Exposure allows you to shoot two images and superimpose one on top of the other to create an artistic effect. GIF mode, for those who have been living under a rock, basically creates a moving picture.
(Click for full size)Our sample images in regular light conditions had good amounts of detail and didn't look pixellated at all. However, the overall tone was a little too warm for our liking. You will need to use HDR to prevent images from being overexposed. Tip: contrary to popular belief, you will get better photos from under shadows than in harsh sunlight.
(Click for full size)The BSI sensor shows off its prowess in low light situations and we really got some very impressive shots. There is a perceptible amount of noise but it is not as bad as other smartphone cameras. In fact, the low light performance of the camera is on par with that of the Huawei Honor 6 Plus (Review | Pictures), and that is saying a lot.
(Click for full size)The 5-megapixel front camera does a very good job of capturing selfies, even without the Beautify effect applied. 1080p video captured by the camera was, on the other hand, a letdown, primarily because even in sufficient light a lot of areas were underexposed.
(Click for full size)Performance
Performance-wise we have no complaints, but the Mirror 3 is far from a powerhouse. It does basic tasks well but struggles the moment you throw anything intensive at it, such as graphically-rich games like Asphalt 8.
In the AnTuTu and GFXbench tests, the Mirror 3 scored 19,840 and 10,974 respectively, which are slightly lower than some other smartphones we've tested in the past with the same SoC. The graphics benchmark test 3DMark Ice Storm returned a score of 5,236, whereas the phone achieved 9.5fps in GFXbench.The Mirror 3 played all the videos we there at it, including our most heavily encoded 40Mbps sample footage. The speaker is adequately loud and the bundled earphones will more than suffice for normal usage. The quality of sound in phone calls is pretty good, and we didn't face any call drops either. The battery lasted 8 hours and 1 minute in our video loop battery test, which is surprisingly decent for a phone with a 2,000mAh battery.
VerdictThe Oppo Mirror 3 is priced at Rs.16,990, which is slightly steep for what it offers. However the primary camera shoots great low-light shots, which could be a great selling point for many buyers. Buy this only if you want to use your smartphone to capture photographs or if you get a kick out of using your phone as an Infrared remote control for all your electronic appliances.


